Thursday, March 10, 2016

Real Southern Fried Chicken

Have I talked about Fried Chicken before? In the five or six years this blog has existed...I must have...
Well, today...I'm talking about it again...How to prepare it ,even if you weren't born below the Mason Dixon line..

 Southern fried chicken is more about the style of cooking,rather than where you're from. There are so many variances (even among Southern cooks in the same region); it's all about choosing which tips make it a winner, winner, chicken dinner for you.


1. Cut the breast into thirds

Traditionally, fried chicken is left on the bone. While it's common to leave the breasts whole or to cut them into two pieces, many people swear by cutting the breast into three pieces because it cooks just as quickly as other pieces. It also guarantees more white meat pieces to go around, although with fried chicken, the dark meat is where it's at.

2. Buttermilk, baby!Buttermilk!!!

The best fried chicken is brined in buttermilk seasoned with salt and pepper (and sometimes other seasonings) for four to 24 hours. The lactic acid tenderizes the meat over time. This buttermilk brine also gives the chicken that authentic Southern "twang" — like our accents, I guess. If you don't have buttermilk, use regular milk.

3. Batter or breading?

Generally it's breading. Batter is more like what you get from Long John Silver's chicken, which is freaking awesome but not what most people think of when you say, "Southern-fried."


4. Hot sauce or cayenne?

Queen Bee, Beyonce aint the only one who has Hot Sauce in her bag swag!!!Either or both is fine, actually. Unless you are attempting a spicy chicken, it's just there in a high-enough quantity to add depth. If you have a sensitivity, you could easily try paprika, soy sauce or fish sauce (just reduce the salt if you use the latter two).


5. Other herbs and spices

Everyone has their own recipe, and unless it tastes bad, you're not wrong. Dry ingredients can usually go anywhere, but wet ingredients belong in the brine.

6. To MSG, or not to MSG

KFC uses MSG; it's part of the secret to their chicken's punch of umami. The reality is, there's no definitive proof that MSG is harmful to most people. I use it, but it's your call. If you're using soy sauce or fish sauce instead of hot sauce, you don't need it anyway.

7. Take a tip from Korea

Korean fried chicken is known for its delightful crunch, and the secret is in the breading and frying. Add a little cornstarch to your flour to get added crunch. Then fry it first at a lower temperature to cook the chicken through, and then at a higher one to amp the crunch.

8. Drying is key

After the brine, pat off the excess liquid before breading it. Then let the chicken sit out to dry (it doesn't take long) so the breading sticks. If you'd like to double-bread it for extra crispness, you can give it a quick dip in the same brine, then back in the breading, but make sure you dry it between each step. This will ensure as much breading as you like stays on your chicken.

9. Room temperature is best

It's best if your chicken is room temperature when it goes in the fryer. Cold chicken lowers the temperature of the oil more than is optimal for a cooked-through product and crispy crust. But keep the chicken refrigerated as much as possible after the other steps. Food safety first!


10. You don't need a deep fryer

In fact, I hate them. They're hard to clean and take up room as a one-hit-wonder gadget. I use an enamel-coated cast-iron Dutch oven, which maintains temperature well and will go to whatever temperature you want, whereas consumer fryers usually cap out a bit low for some applications. The enamel coating is optional (though I do recommend the cast iron); it just needs a heavy bottom and high-enough sides to hold the oil with the chicken without splattering everywhere.

11. Watch the oil temperature

The oil temp needs to stay as consistent as possible and just low enough to cook the chicken through and keep the outside crisp. Start with one piece as a test, just as you would with a pancake. Use a meat thermometer (not the same one you're using for the oil) to test for doneness. Be careful to not touch the bone, or you'll get an inaccurate reading.
In general, you want the meat temperature to be slightly lower than a perfectly done temperature, since the chicken will keep cooking as it sits. You can always test the meat temperature again and put it in the oven for a bit to finish. This is especially important if you plan to double-fry.

12. Say "no" to paper towels

Many fried foods can be drained on paper towels, and that's fine for some food. But draining directly on paper towels is the kiss of death for longer-cooking fried chicken. It will get soggy after a while. Instead, line a baking sheet with paper towels, and place your chicken on a wire rack over the sheet so the fat can properly drip off without soaking back into the chicken.

13. Remember what you like

Look, "Southern-fried" chicken is sold all over the world — it's even made an appearance in one of the final rounds of Masterchef Canada as an elimination dish. The important thing is that you get your chicken the way you want it. That's what Southern comfort food is all about. You want to throw some garam masala in the breading? Well, I can't say it's traditional, but I can say I'd like you to save me a piece....Hook a brotha up!

Enjoy!  Eat and drink well my friends...


Saturday, March 5, 2016

Cinnamon French Toast

Have I talked about French Toast on this Blog before?  I'm sure I have...So what you say may make this recipe different from the others?

Well..It might be a tad healthier...

This French toast recipe cuts back on fat by using only 1 whole egg and 2 egg whites.
Add a little cinnamon sugar to the French toast before drizzling with the syrup of your choice.

Check it out-

INGREDIENTS-
  • 2 large eggs
  • 2 large egg whites
  • 1/4 cup milk
  • 1/4 teaspoon vanilla extract
  • 1/4 teaspoon ground cinnamon
  • dash nutmeg, optional
  • 6 to 8 slices French bread, sliced on diagonal
  • cinnamon sugar, optional
DIRECTIONS-


In a shallow bowl, whisk egg and egg white until foamy.

Whisk in the milk, vanilla, cinnamon, and nutmeg.

Heat a warming drawer or heat the oven to 200° F.

Heat butter in heavy skillet over medium-low heat. Dip 4 slices of bread in the egg mixture, turning to coat thoroughly.

Let excess drip back into a bowl.

Place coated bread slices in hot skillet.

 Cook, turning with a spatula, until both sides are nicely browned, about 2 minutes each side.


Transfer to a warm plate and keep warm in the oven (or warming drawer). Repeat with remaining slices of bread and egg mixture.

To serve, sprinkle with cinnamon sugar if desired.

Serve with maple syrup, golden cane syrup, sorghum, or your favorite pancake syrup.


Enjoy! Eat and Drink Well My Friends!

Friday, March 4, 2016

Korean Style Short Ribs

The Tasty richness of these Short Ribs is perfectly offset by the tangy crunch of the cabbage in this easy weeknight dish.

Just throw these short ribs into the marinade in the morning and pull them out when you arrive home after a long workday. (Works for me)

 This recipe calls for flanken-cut short ribs, which is a method of cutting across the ribs instead of between them Which is how most people cut them.

You’ll likely need to request this cut specifically from your butcher.

So check this out-

INGREDIENTS:
  • 2 Tablespoons coconut aminos
  • 2 Tablespoons fish sauce(Optional)
  • 3 Tablespoons rice wine vinegar, divided
  • 2 Teaspoons hot sauce
  • 1 Tablespoon coconut palm sugar
  • 1 Teaspoon sesame oil
  • 2 garlic cloves, minced
  • 1 Teaspoon fresh ginger, minced
  • 1 1/2 Pound flanken-cut beef short ribs, cut 1⁄2 inch thick and patted dry
  • 5 Cups shredded red cabbage
  • 4 green onions, sliced paper thin on a bias
DIRECTIONS-


Combine the coconut aminos, fish sauce, 2 tablespoons of the rice wine vinegar, hot sauce, palm sugar, sesame oil, garlic, and ginger in a glass baking dish or bowl. Add the short ribs, cover, and marinate in the refrigerator for up to 12 hours.
Line a sheet pan with foil and top with an oven-safe baking rack. Remove the short ribs from the marinade, shaking off any excess. Place the ribs on top of the rack and allow to air-dry for about 30 minutes.

Preheat the broiler and place the oven rack on the top level, about 5 inches from the heating element. Broil the short ribs for 5 minutes, then flip over and broil for another 5 minutes. Remove the rack to a heat-safe countertop and pour the cabbage onto the pan, tossing to coat in any pan juices. Broil for 1 to 2 minutes, or until the cabbage
is barely wilted. Season with the remaining 1 tablespoon rice wine vinegar and garnish with the green onions. Serve alongside the short ribs..

A Nice red Wine should go well with this..


Enjoy!   Eat and Drink Well My Friends...

Tuesday, February 23, 2016

Southwest Cobb Salad


I really meant to post more this month...To pay at least partly as much attention to this blog as I pay to my other two...Well regardless...I'm here...

For those who believe you should be quote- "Eating the rainbow" Whatever that is supposed to mean... can get any more literal than this Southwest Cobb Salad with Smokey Chili Lime Dressing. I mean look at the photo above!

This really is the healthy version of tasting the rainbow...Skittles aint good for you...Everybody knows that...too sweet...might give you Diabetes....Just kidding...

So check out this recipe..

INGREDIENTS:

1 1/2 cups mayonnaise ( Paleo )
1 limes ( Juice of 1 large lime )
1 tablespoon apple cider vinegar
2 teaspoons honey
1 teaspoon yellow mustard
1 clove(s) garlic ( minced )
1/2 teaspoon smoked paprika
1/2 teaspoon chili powder
1 teaspoon salt
1 tablespoon chives ( chopped )
1 tablespoon cilantro ( finely chopped )                              


For the Chicken Marinade

4 chicken breast ( large )
Olive oil,
Vinegar,
Balsamic Lime juice pinch chili flakes ( large )
1/2 teaspoon ground cumin
1/2 teaspoon smoked paprika                                   
Salt
1/2 teaspoon ground black pepper ( coarse )

For the Salad

6 romaine lettuce ( Small Romaine Hearts, chopped into bite-sized pieces )
1/2 cup cilantro ( roughly chopped )
1 red onion ( small, chopped )
1 Red Bell Pepper ( chopped )
1 Orange Bell Pepper ( chopped )
1 Yellow Bell Pepper ( chopped )
2 avocados ( pitted and sliced into 1/2\" cubes )
1/2 cup pico de gallo
1 black beans ( can, drained )


 DIRECTIONS:To make the dressing: Add all of the dressing ingredients to a blender and blend

  • Add the oil, balsamic vinegar, lime juice, chili flakes, cumin, salt, and pepper to a mixing bowl and whisk together until combined.

  • Add the chicken, turning until all breasts are well coated.

  • Cover and let sit in the refrigerator for at least one hour or overnight.

  • Cook chicken on a hot grill until both sides have nice grill marks and chicken is cooked through.

  • Let sit for 10 minutes before slicing.                             
                                       
  • Xtra special thanks to Megan from "My Recipe Magic" for this recipe..

    Taste the rainbow....Enjoy...Eat well my friends!

    Thursday, February 18, 2016

    Turkey Pesto Panini

    It's been awhile since I wrote anything for this blog too...What can I say? I'm finding a new energy for writing now of days...

    Bread...turkey...cheese...avocado..pesto—do I have your attention yet? If so...let me turn you on to Turkey Pesto Panini...

    INGREDIENTS:
  • 1 tablespoon olive oil
  • 1 loaf of French bread, cut into 3-4 equal pieces
  • 1/2 cup pesto, homemade or store-bought
  • 4-8 ounces mozzarella, sliced
  • 2 cups chopped leftover Thanksgiving turkey
  • 2 Roma tomatoes, thinly sliced
  • 1 avocado, halved, seeded, peeled and sliced

  • DIRECTIONS :

  • Heat olive oil in a grill pan over medium-high heat.
  • Spread 2 tablespoons pesto over 1 side of French bread and top with mozzarella, turkey, tomatoes, avocado and top half of bread. Repeat with remaining slices of bread.
  • Add sandwich to pan and grill until the bread is golden and the cheese is melted, about 2-3 minutes per side.

  • Just to remind you of how good this really is...

    Ummmmm, enjoy!! Eat well my friends.

    Thursday, February 11, 2016

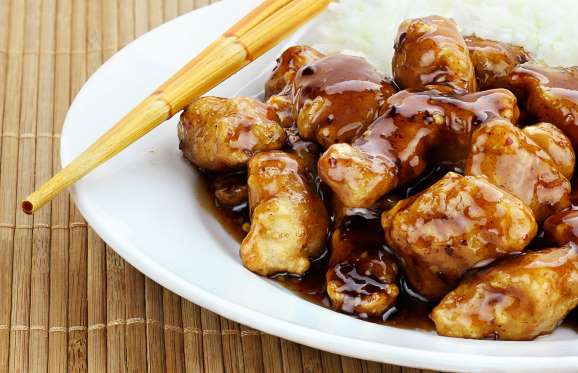
    General Tso's Chicken

    An Air Force Buddy turned me on to General Tso's Chicken in the 1990's....And No, I wasn't in the Orient or in Europe somewhere on assignment...I was right here in Philadelphia and I got it from a neighborhood Chinese Food Store right in my West Philadelphia neighborhood...

    I've been a fan ever since.

    The recipe was created by chef Peng Chang-kuei who cooked for national banquets and eventually caught the eye of Chairman Mao Zedong himself. Chinese food’s popularity in the West exploded in the 1970s, with New York City as the capital of the western embrace of regional Chinese cooking (due to the influx of Chinese immigrants after a change in immigration policy in 1965). Two chefs, David Keh and T.T. Wang, traveled to Taiwan to learn from chef Peng in 1971, and promptly returned with a recipe for General Tso’s Chicken that they featured in their New York Times review of Hunan-style restaurants.

    I didn't know this then....I didn't know it until yesterday, to tell you the truth...I've been eating this chinese delicacy for years...Now I can finally share the recipe with you...

    INGREDIENTS:

    For the sauce

    • 1 Tablespoon tomato purée
    • 1 Tablespoon water
    • 1/2 Teaspoon potato flour
    • 1/2 Teaspoon dark soy sauce
    • 1 1/2 Teaspoon light soy sauce
    • 1 Tablespoon rice vinegar
    • 3 Tablespoons chicken stock or water

    For the chicken

    • 4 boneless chicken thighs (about 3/4 pound)
    • 2 Teaspoons light soy sauce
    • 1/2 Teaspoon dark soy sauce
    • 1 egg yolk
    • 2 Tablespoons potato flour
    • 2 Teaspoons plus 2-3 tablespoons cooking oil, plus more for deep-frying
    • 6-10 small dried red chiles, snipped into 3/4-inch sections and seeded
    • 2 Teaspoons finely chopped ginger
    • 2 Teaspoons finely chopped garlic
    • 2 Teaspoons sesame oil
    • 1 Tablespoon thinly sliced scallions, green parts only (optional
    DIRECTIONS: 

    For the sauce

    Combine all of the ingredients mentioned above in a small bowl.

    For the chicken

    Unfold the chicken thighs and lay them, skin side down, on a cutting board. (If some parts are very thick, lay your knife flat and slice them across in half, parallel to the board.)
    Use a sharp knife to make a few shallow criss-cross cuts into the meat — this will help the flavors penetrate. Then, cut each thigh into 1 ½- to 1 ¾-inch-long slices, an uneven 1/8 inch or so in thickness. Place the slices in a bowl.

    Add the soy sauces and egg yolk to the chicken and mix well. Then stir in the potato flour, and lastly 2 teaspoons of the oil. Set aside.

    Place a wok over high heat and line a plate with paper towels. Add just enough oil to submerge the chicken (you may need to do this in batches) and heat to 350-400 degrees. Add the chicken and fry until crisp and golden. Remove the chicken with a slotted spoon to the paper towels. Pour the oil into a heatproof container and clean the wok if necessary.

    Return the wok to high heat. Add the remaining cooking oil and the chiles and stir-fry briefly until they are fragrant and just changing color (do not burn them). Toss in the ginger and garlic and stir-fry for a few seconds more, until you can smell their aromas. Then add the sauce and stir as it thickens.
    Return the chicken to the wok and stir vigorously to coat the pieces in sauce. Stir in the sesame oil, then serve, with a scattering of scallions, if using.

    Enjoy!! Eat well My friends!

    Food Safety Tips
    Protect yourself against food-borne illnesses.


    1. Use a "refrigerator thermometer" to keep your food stored at a safe temperature (below 40 degrees fahrenheit).

    Cold temperatures slow the growth of bacteria. Ensuring that your refrigerator temperature stays at 40 degrees Fahrenheit or colder is one of the most effective ways to reduce your risk of food-borne illness. You can buy a refrigerator/freezer thermometer at appliance stories, home centers (i.e. Home Depot), and kitchen stores including online ones, such as Cooking.com.

    2. Defrost food in the refrigerator, the microwave, or in cold water... never on the counter!

    Perishable foods should never be thawed on the counter for longer than two hours because, while the center of the food may remain frozen, the outer surface may enter the Danger Zone, the range of temperatures between 40 and 140 degrees fahrenheit, in which bacteria multiply rapidly. If you’re short on time, use the microwave or you can thaw meat and poultry in airtight packaging in cold water. Change the water every half-hour so it stays cold and use the thawed food immediately.

    3. Always use separate cutting boards for raw meat/poultry/fish and cooked foods/fresh produce.

    Bacteria from uncooked meat, poultry, and fish can contaminate cooked foods and fresh produce. An important way to reduce this risk is to use separate cutting boards for raw meat/poultry/ fish, and cooked foods/fresh produce.

    4. Always cook meat to proper temperatures, using a calibrated instant-read thermometer to make sure.

    One effective way to prevent illness is to use a food thermometer to check the internal temperature of meat, poultry, and egg dishes. The USDA Recommended Safe Minimum Internal Temperatures are as follows:

    * Beef, veal, and lamb (steaks and roasts), fish - 145 degrees fahrenheit

    * Pork and ground beef - 160 degrees fahrenheit

    * Poultry - 165 degrees fahrenheit.

    Cook meats like roasts and steaks to lower temperatures, closer to medium-rare, so that they retain their moisture. It is recommended that those who are at high risk for developing food-borne illness (i.e. pregnant women and their unborn babies, newborns, young children, older adults, people with weakened immune systems, or certain chronic illnesses) should follow the USDA guidelines.

    5. Avoid unpasteurized/raw milk and cheeses made from unpasteurized milk that are aged less than 60 days.

    Raw milk is milk from cows, sheep, or goats that has not been pasteurized (heated to a very high temperature for a specific length of time) to kill harmful bacteria that may be present. These bacteria, which include salmonella, E. coli and listeria, can cause serious illness and sometimes even death. The bacteria in raw milk can be especially dangerous to pregnant women, children, the elderly, and people with weakened immune systems or chronic illnesses. Raw milk cheeses aged 60 days or longer are okay, since the salt and acidity of the cheese-making process make for a hostile environment to pathogens.

    6. Never eat "runny" eggs or foods, such as cookie dough, that contain raw eggs.

    Even eggs that have clean, intact shells may be contaminated with salmonella, so it’s important to cook eggs thoroughly until both the yolk and the white are firm. Casseroles and other dishes containing eggs should be cooked to 160 degrees fahrenheit and you can use an instant-read food thermometer to check. Eggs should always be cooked fully and those who are at high risk for developing foodborne illness (pregnant women and their unborn babies, newborns, young children, older adults, and people with weakened immune systems or certain chronic illnesses should follow the USDA guidelines. If you can’t resist runny eggs or sampling cookie batter, use pasteurized eggs. They’re found near other eggs in large supermarkets.

    7. Always wash your hands in warm soapy water for at least 20 seconds before handling food and after touching raw meat, poultry, or eggs.

    You can pick up a lot of bacteria out in the world, so it’s important to always wash your hands before you eat or prepare food. You should also wash your hands after touching any uncooked meat, poultry, fish, or eggs, as the bacteria from these foods can contaminate cooked foods and fresh produce. Use soap and warm water and wash thoroughly for at least 20 seconds.

    8. Always heat leftover foods to 165 degrees fahrenheit.

    The USDA recommends heating all cooked leftovers to 165 degrees fahrenheit in order to kill all potentially dangerous bacteria.

    9. Never eat meat, poultry, eggs, or sliced fresh fruits and vegetables that have been left out for more than two hours or more than one hour in temperatures hotter than 90 degrees Fahrenheit.

    If you leave perishable foods out of the refrigerator or freezer for more than two hours they may enter the Danger Zone—the unsafe temperatures between 40 and 140 degrees Fahrenheit, in which bacteria multiply rapidly.

    10. Whenever there’s a food recall, check products stored at home to make sure they are safe.

    You should discard any food that’s been recalled because it’s associated with the outbreak of a food-borne illness. But, according to a survey conducted by Rutgers University during the fall of 2008, only about 60% of Americans search their homes for foods that have been recalled because of contamination. For more information on food recalls, visit the website Recalls.gov


    Cavier & Vodka
    Courtesy of The Lady (Bug) of the Household