Thursday, April 26, 2012

Baked Curran Doughnuts


There goes my sweet tooth again... Everybody loves doughnuts...Hot ,sweet doughnuts out of the oven with a nice tumbler of hot coffee for breakfast!!! Here is a real sweetheart of a recipe for you!

Baked Curran Doughnuts.  I am told that Robert Jörin, a third-generation Swiss baker at the Culinary Institute of America at Greystone came up with this recipe for these delicious light doughnuts.

INGREDIENTS:
1 cup(s) dried currants

1 envelope(s) active dry yeast

Granulated sugar

3 cup(s) all-purpose flour

3/4 teaspoon(s) freshly grated nutmeg

1/4 teaspoon(s) cinnamon

3/4 cup(s) milk, warmed

1 large egg

1 large egg yolk

1 stick(s) unsalted butter, softened

4 tablespoon(s) melted butter

2 teaspoon(s) kosher salt

DIRECTIONS:

In a medium bowl, cover the currants with hot water and let stand until softened, 20 minutes. Meanwhile, in a small bowl, stir the yeast with 2 tablespoons of warm water and a pinch of sugar and let stand until foamy, 5 minutes.

In the bowl of a standing mixer fitted with the dough hook, combine the flour, nutmeg, and cinnamon with 1/4 cup of sugar.

Add the milk, egg, egg yolk, and half of the softened butter; beat at low speed for 3 minutes. Beat in the yeast, then add the salt. Beat the dough on medium speed until soft and silky, about 8 minutes; the dough should pull cleanly away from the bowl.

With the machine on, add the remaining softened butter to the dough in walnut-size lumps, beating at low speed between additions until incorporated. Drain the currants, pressing out any excess water; beat them into the dough on low speed. Transfer the dough to a greased bowl, cover, and let stand in a warm, draft-free spot until doubled in bulk, 1 hour. Punch it down, reform into a ball, and return to the bowl.

Cover and let stand until billowy, 1 hour. Butter 2 large baking sheets. Turn the dough out onto a work surface and cut it into 12 equal pieces. Pinch each piece into a ball and arrange 6 balls on each of the prepared baking sheets, smooth sides up.

Cover with plastic wrap and let stand for 10 minutes. Using lightly floured hands, press each ball into a flat 4-inch disk. Using a 1 1/4-inch round cutter, stamp out the centers of each disk, and return the holes to the baking sheets.

Cover loosely with plastic wrap and let stand for 1 hour, until risen slightly.

Position racks in the upper and lower thirds of the oven and preheat the oven to 400 degrees F. Bake the doughnuts and holes for 25 minutes, shifting the pans from top to bottom and front to back halfway through; the doughnuts are done when they are golden and puffy and an instant-read thermometer inserted into the thickest part registers 200 degrees F.


Spread sugar in a shallow bowl. Brush the hot doughnuts and holes on both sides with the melted butter and dredge them in sugar. Transfer them to a platter and serve with a nice cup of coffee!

Enjoy!

Wednesday, April 25, 2012

The Cuban

I'm a  Philly guy...so you know that I talk about my Cheese-steaks and my hoagies....My family however has it's origins in Florida.  What I'm hearing is that the cities of Tampa and Miami are fighting over where the popular sandwich known as the "Cuban" ,originated....

I don't know...But I've been in Miami and I've had one and it is good...Don't know when I'll be in Miami next, but I've got the instructions for you on how you can make your own...It's really quite simple.

INGREDIENTS:


Classic ham and cheese sandwiches are made Cuban with pickled hot peppers and the pressed grilling method by which they are cooked. If you prefer a less spicy version, substitute sliced dill pickle rounds for the peppers.


 4 (sandwich-sized) English muffins, halved

8 teaspoon(s) unsalted butter, softened


8 ounce(s) Muenster or Monterey Jack cheese, thinly sliced


4 ounce(s) smoked ham, thickly sliced

Pickled hot pepper rings


2 tablespoon(s) vegetable oil


DIRECTIONS:


Spread 1 teaspoon butter on the split side of each English muffin half. Equally divide Muenster (or Monterey Jack) cheese and ham among 4 buttered halves. Top ham on each sandwich with 2 pickled hot pepper rings; arrange remaining muffin halves on top.


In 12-inch skillet heat vegetable oil over low heat. Add sandwiches and put small heavy skillet directly on top as weight. Cook sandwiches 3 minutes, remove small skillet, turn sandwiches, and replace skillet. Cook sandwiches 3 minutes more, or until cheese has melted.

Enjoy!

Saturday, April 21, 2012

Banana Lime Fizz


Heyyy folks...It's the weekend baby!!! and here is a nice sparkling and healthy drink that's sure to be a brunch favorite... The Banana Lime Fizz..
This sparkling brunch beverage combines frozen limeade, bananas, and heavenly apricot nectar to make a snappy drink your guests won't soon forget.


INGREDIENTS:

1 can(s) (6-ounces) frozen limeade concentrate

2 large bananas, cut up

1 can(s) (12-ounces) apricot nectar


3 cup(s) seltzer, chilled


DIRECTIONS:

1.In blender at high speed or in food processor with knife blade attached.

2. Blend frozen limeade concentrate, bananas, and apricot nectar until smooth.

3. Pour mixture into large pitcher; with spoon, stir in seltzer. See, very simple.

Enjoy!

Monday, April 16, 2012

Tea Smoked Roast Chicken


Here I am finding yet another way to fix the chicken or the "yardbird" as I have heard some of my older friends lovingly refer to it! First things first,Smoking the birds quickly over anise-scented tea makes them wonderfully fragrant. If you prefer to cook one chicken instead of two, smoke it in a wok or a pot rather than a roasting pan.

INGREDIENTS:

Brined Chicken
2 quart(s) water
6 clove(s) garlic, smashed
5 dried red chiles
4 star anise pods
3 tablespoon(s) honey
1 (2-inch piece) fresh ginger, peeled and thinly sliced
Zest of 1 small orange or tangerine, removed in strips with a vegetable peeler
1 (1-inch piece) cinnamon stick
1 cup(s) soy sauce
1 small yellow onion, quartered
1 tablespoon(s) sugar
2 (3 1/2-pound) chickens, wing tips removed

Tea-Smoking Mixture
1/2 cup(s) jasmine rice
1/4 cup(s) sugar
2 tablespoon(s) sugar, combined with above sugar
1/4 cup(s) loose black tea
2 tablespoon(s) loose black tea, combined with above tea
6 star anise pods, broken into pieces
4 dried red chiles, broken into pieces
Vegetable oil, for rubbing
1 teaspoon(s) Sichuan peppercorns, crushed
Salt

Scallion-Ginger Sauce
6 scallions, white and pale green parts only, minced
3 tablespoon(s) finely grated fresh ginger
1/4 cup(s) vegetable oil
Salt

DIRECTIONS:

1.Prepare the brined chicken: In a pot, combine the water, garlic, chiles, star anise, honey, ginger, orange zest, cinnamon, soy sauce, onion, and sugar. Simmer over moderate heat for 10 minutes. Let cool.

2.Set 2 large oven roasting bags or other sturdy bags in a roasting pan just large enough to hold the chickens. Set the chickens in the bags and pour in the brine. Turn the chickens to coat them completely with brine. Turn the chickens breast side down and tie the bags. Refrigerate for 24 hours.

3.Prepare the smoking mixture: Preheat the oven to 375 degrees F. In a bowl, combine the rice, sugar, tea, star anise, and chiles. Remove the chickens from the roasting pan. Line the pan with a double layer of heavy-duty aluminum foil. Scatter the tea mixture on the foil and set a rack in the pan. Remove the chickens from the brine and pat dry. Transfer the chickens to the rack, breast side up; be sure they do not touch the side of the pan. Tent heavy-duty foil over the chickens and seal all around the edge of the pan. Seal overlapping pieces of foil with tape.

4.Set the roasting pan over high heat and cook for 2 minutes. Reduce the heat to moderately low and cook for 5 minutes. Remove the pan from the heat and let stand for 3 minutes. Uncover the chickens and let rest for 10 minutes.

5.Transfer the chickens to a rimmed baking sheet, breast side up. Rub the chickens with vegetable oil, sprinkle with the Sichuan peppercorns, and season lightly with salt. Roast in the upper third of the oven for 35 minutes. Increase the oven temperature to 425 degrees F and continue to roast for about 35 minutes longer, until an instant-read thermometer inserted in the inner thighs registers 165 degrees F. Transfer the chickens to a carving board and let rest for 10 minutes.

6.Make the scallion-ginger sauce: In a bowl, combine the scallions, ginger, and oil and season with salt. Carve the chickens and serve with the sauce.

Serve this with a nice Red Wine-


Enjoy!

Friday, April 13, 2012

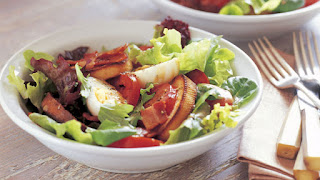
Salad Compost!


As the temperatures get warmer...You may find that it is healthier to eat a salad...Here is a unique recipe for a diffrent type of salad...

INGREDIENTS:

Salad-

1 small French bread stick

2 clove(s) garlic, crushed

1/4 cup(s) olive oil

6 strip(s) thin-sliced bacon

5 ounce(s) mesclun

6 medium plum tomatoes, sliced thinly

4 hard-boiled eggs, halved len1 small French bread stick

2 clove(s) garlic, crushed

1/4 cup(s) olive oil

6 strip(s) thin-sliced bacon

5 ounce(s) mesclun

6 medium plum tomatoes, sliced thinly

4 hard-boiled eggs, halved lengthways.

Red Wine Vinaigrette:

1/4 cup(s) red wine vinegar

1 tablespoon(s) Dijon mustard

1/3 cup(s) extra virgin olive oil


DIRECTIONS:

1.Preheat broiler. Combine garlic and oil.

2.Cut bread into 1/2-inch slices. Brush both sides with combined garlic oil; toast under preheated broiler.

3.Cook bacon in large frying pan until crisp; drain on absorbent paper.

4.Meanwhile, place ingredients for red wine vinaigrette in screw-top jar; shake well.

5.Layer bread and bacon in large bowl with mesclun and tomato, top with egg; drizzle with vinaigrette.

As usual...I would serve this with Ice Tea....Enjoy!


Somehow I get the impression I'm writing about this stuff a little pre-maturely!  I mean,it's only early spring!

Tuesday, April 10, 2012

Jamaican Jerk Chicken


I thought I'd try a little something different tonight...A Jamaican standard !! Jerk Chicken...Here are the easy instructions-

Jamaican Jerk Chicken-

INGREDIENTS:

1- 3 lb Chicken

1 Lime

24 Pimento Beans (Allspice)

2oz Scallion

2 Scotch Bonnet Pepper

5sprigs. Thyme

1/2 whole Nutmeg (Grated)

Salt (Pinch)

2 peg Garlic

1 oz. Paprika (for Color)

1 oz. Oil (optional)

1/2 oz Soy Sauce

1 tbsp. Sugar

Note: If you would like to remove the spicy heat from this season, don’t use the Scotch Bonnet Pepper.

DIRECTIONS:

Put all ingredients in the Electric Blender,except the lime, and turn the selector to puree. Make sure the ingredients are blended well together before removing from Blender.

Cut up chicken 8-ways (Wing, Drumstick, Thigh, and Breast). Wash chicken parts in lime juice and water. Remove meat from lime and water solution and discard.

Next, you pour a little of the jerk season that you just made on the chicken. Rub in the season with your hand (use plastic gloves if you have them). Repeat doing this until all the meat is covered with the season.

(Optional) You can let this sit in the refrigerator overnight or let it sit for a couple of hours. It’s your choice.

Or do as I do.

OVEN

Pre-heat the oven to 400 degrees F. Place the seasoned Jerk chicken skin side up on a baking sheet and then place it in the oven.

Bake the chicken for about 35 minutes, remove the baking sheet from the oven, and turn the chicken onto the other side. Bake chicken for about 25 minutes more, or until thoroughly cooked.

GAS OR CHARCOAL GRILL

Place your seasoned Jerk chicken on the Grill and monitor the flame so that the temperature stays at or about 350 degrees F. Turn the meat as needed, while keeping the flame low. And if the flame gets too high it will prematurely burn the meat.

This process takes a little time and patience, but it’s worth the effort. The meat will be completely cooked in about 45-minutes.

If not, keep turning until the meat is thoroughly cooked, remove chicken from the Grill and serve with bread, garden salad, baked potatoes, or plain white rice.

OPEN PIT

(This method is definitely for you folks who have a lot of spare time.)

Another thing, do not cut up the chicken. Instead, slice the chicken breast and open the whole chicken wide.

In your back yard or campsite, dig a pit 4 feet long by 21/2 feet wide by 2 feet deep. Taper the long ends of the pit about 45 degrees.

Place the wood in the pit and add your starter fluid or accelerant of choice.

Light the wood and allow the wood to burn to coal. Scatter the coal so that the heat will distribute evenly in the pit.

Place 1/8” steel rods across the pit in a 2” square matrix pattern. Or use the same diamond mesh that’s used in barbecue grills.

Place your seasoned Jerk chicken on the steel matrix; let the chicken cook slowly for about an hour.

Turn chicken on other side, baste if necessary, monitor until chicken is cooked.

(Optional) You can add hickory wood or your other favorite flavored wood to the pit, when making this type of Jerk Chicken.Serve with your favorite food.. Prefferably, rice and peas, like in the photo above..

Enjoy Mon!

Sunday, April 8, 2012

Honey Baked Ham


This recipe was borrowed from two of my favorite people...The Neeleys...When I was in Memphis last summer, I had the pleasure of dining at their establishment. Great Food!!! and here is a great recipe for Honey Baked Ham.


Ingredients:

6 pounds bone-in ham

1/3 cup brown sugar

1/3 cup honey

2 teaspoons cornstarch

1/4 teaspoon red pepper flakes

1/4 teaspoon cayenne pepper

Directions:

Preheat oven to 350 degrees F.

Place ham on a rack in a foil lined roasting pan. Bake the rounded side up for one hour.

In a medium saucepan over medium heat, mix all ingredients together. Stir until it forms a nice thick glaze.

Rub on half of the glaze and bake for 30 minutes more. Flip the ham over and rub on remaining glaze and bake for 1 hour more. Remove from oven and allow the ham to rest for at least 30 minutes before serving.

Enjoy!

Friday, April 6, 2012

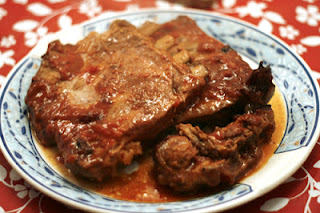
Slow Cooker Spare Ribs


As the weather gets a little warmer one's mind turns towards ribs....Okay, well my mind is turning to them and not necessarily ribs cooked on the grill, but rather over cooked...Slowwwww cooker Spare ribs..

INGREDIENTS:

•2 racks spareribs

•1 onion, cut in chunks

•2 cloves garlic, halved

•2 teaspoons salt

•1/4 teaspoon ground black pepper

•*****
Sauce:
•2/3 cup ketchup

•2/3 cup cider vinegar

•1/2 cup packed light brown sugar

•3 tablespoons maple syrup

DIRECTIONS:

Put the ribs, onion, garlic, 2 teaspoons of salt, and 1/4 teaspoon of pepper in a large saucepan. Cover with water and bring to a boil over high heat. Reduce heat to low and simmer for 45 minutes.

In a medium saucepan, combine the ketchup, vinegar, brown sugar, and maple syrup. Boil sauce ingredients over medium heat until reduced and thickened, about 45 minutes.

With a slotted spoon, transfer the ribs to the slow cooker. Add the sauce; cover and cook on LOW for 5 to 7 hours.

Serve with: Baked Beans-


Corn on the Cobb:


and sweet tea-


Yeah...I can't wait for summer...can't you tell?   Enjoy!

Wednesday, April 4, 2012

Hot Crossed Buns


Must be my sweet tooth this week..I don't know...but first I wrote about the Apple Pie,Now I'm writing about Hot Crossed Buns.. Anyway..Here is a great recipe for a snack you might think about preparing for your guests on Ressurection Sunday! (Easter for us old school cats!)


INGREDIENTS:

1 cup(s) milk

1 tablespoon(s) milk, warmed to 110°F

1 package(s) dry active yeast

3/4 cup(s) sugar

1 teaspoon(s) sugar

2 1/4 cup(s) all-purpose flour

2 cup(s) bread flour

1/2 cup(s) black raisins

2 tablespoon(s) candied lemon peel, cut into 1/4-inch pieces

2 tablespoon(s) candied orange peel, cut into 1/4-inch pieces

1 teaspoon(s) salt

1/2 teaspoon(s) cinnamon

1/4 teaspoon(s) ground nutmeg

1/8 teaspoon(s) ground cloves

4 tablespoon(s) unsalted butter, melted

2 large eggs

1 large egg yolk

2/3 cup(s) confectioners' sugar

1/4 teaspoon(s) vanilla extract


DIRECTIONS:

1.Make the dough: Coat a large bowl with oil and set aside. Combine the 1 cup milk, yeast, and the 1 teaspoon sugar in a small bowl and let stand until bubbly. Combine the flours, remaining sugar, raisins, candied peels, salt, and spices in the bowl of a standing mixer fitted with a dough hook (or in a large mixing bowl) and mix on low speed. Add the butter, 2 eggs, and the yeast mixture and continue to mix until a sticky dough forms -- about 3 minutes.

Transfer the dough to a lightly floured surface and knead by hand until smooth -- about 5 minutes. (If dough has been combined by hand, increase kneading time to 10 minutes.) Form the dough into a ball, place it in the prepared bowl, and turn to coat all sides with oil. Cover with a clean, damp kitchen towel and let rise in a warm, draft-free place until it doubles in volume -- about 1 hour.


2.Shape the buns:
Line a baking pan with parchment paper and set aside. Punch the dough down, transfer to a lightly floured surface, and knead for 3 minutes. Divide the dough into 12 equal-sized pieces -- about 3 1/2 ounces each.

Shape each piece into a ball and place the balls about 1 inch apart in three rows of four on the prepared pan. Cover and let rise until the buns double in volume and touch one another -- about 1 1/4 hours.

3. Bake The Buns-Preheat oven to 500°F. In a small bowl, combine the egg yolk with 1 tablespoon water. Using a pastry brush, lightly brush the mixture on the top of each bun. Place buns in the lower third of the oven and reduce oven temperature to 400°F. Bake until golden brown -- about 20 minutes. Transfer to a wire rack. In a small bowl, combine the confectioners' sugar, remaining milk, and vanilla. Stir until smooth. When buns have cooled slightly, drizzle a horizontal line across each row of buns followed by a vertical line to form a cross on the crown of each bun.


Serve these with milk-


Enjoy!

Monday, April 2, 2012

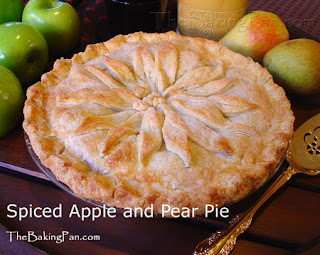
Spiced Apple and Pear Pie!


Yes...You read right...A spiced Apple and Pear Pie!!!! No ,I did not make this up...There is an actual recipe for this...and I am told that this pie is quite good..  It has been months now since I saw -"The Help" and I am over my pie phobia.  You would have had to of seen this movie to know what I'm talking about.. If you didn't see it...don't worry about...Anyway..here is the recipe for slices of heaven.


This pie is everything you could love about apple pies, and more. The pears add extra depth, juice, and flavor, and plus it's gorgeous on top of that. What more can you ask for? Huh?

INGREDIENTS:

Dough:
2 1/2 cups all-purpose flour

1/4 cup sugar

3/4 teaspoon fine salt

3/4 cup cold unsalted butter (1 1/2 sticks), diced

1 large egg

3 to 4 tablespoons very cold water

Filling:

1/2 lemon

3 pounds baking apples, such as Golden Delicious, Cortland, or Mutsu (about 6 apples)

1 1/2 pounds baking pears, such as Bosc or firm Bartletts (about 3 pears)

2/3 cup sugar, plus more for sprinkling on the pie

1/4 teaspoon ground cinnamon

1/4 teaspoon ground ginger

1/4 teaspoon fine salt

Generous pinch freshly grated nutmeg

1/4 cup unsalted butter (1/2 stick)

1/4 cup all-purpose flour

1/2 teaspoon pure vanilla extract

1 large egg, beaten


Dough:

DIRECTIONS:


Whisk the flour, sugar, and salt together in a medium bowl. Rub 1/4 cup of the butter into the dry ingredients with your fingers until completely absorbed. Then rub in the remaining butter until it resembles cornmeal mixed with pea-size bits of butter. (If it gets warm and sticky, refrigerate it to chill.)

Beat the egg with 3 tablespoons of the water; then drizzle it evenly over the dough. Lightly stir the dough together with a fork. (The dough should just hold together when you squeeze it together, with some dry crumbly bits.) If the dough is really dry, sprinkle it with the final tablespoon of water. (To make the dough in food processor, see below.)

Divide the dough in half and wrap each half in plastic wrap and shape into disks. Refrigerate at least 1 hour or up to 2 days. (The dough can be frozen for 2 months. Defrost dough in the fridge overnight.)

Filling:

DIRECTIONS:


Finely grate the lemon zest and set aside. Peel, core and then slice both the apple and pear into 1/2-inch slices. Squeeze the lemon juice over the fruit, then toss fruit with the sugar, cinnamon, ginger, salt and nutmeg.

Melt the butter in a large skillet over medium-high heat. Add the fruit and cook, stirring until the sugar dissolves and juices simmer, about 2 minutes. Reduce heat to medium, and cook, uncovered, until the fruit softens and the juices evaporate some, about 10 minutes. Evenly mix the flour into the fruit; then cook about a minute more to thicken the juices slightly. Stir in the vanilla and lemon zest; and remove from the heat. (The filling should resemble a tight compote.) Cool completely.

Form the pie:

DIRECTIONS:


Lightly dust the work surface with flour. Roll a disk of dough into an 11 to 12-inch circle. Transfer the dough to 9-inch glass pie pan (see photo), trimming so it hangs about 1/2-inch over the edge of the pan. Fill the crust with the prepared fruit so it mounds slightly in the center. Roll the remaining dough into a 12-inch circle. Brush the rim of the crust with some of the egg.

Roll the dough onto the rolling pin and unroll it over the fruit so it hangs over the edge of the pie pan by about 1/2-inch. Trim crust if needed, reserving the scraps for decorations or for patching, if needed. Fold the top crust edge under the bottom one, then press the edges together to seal. Cut trimmed scraps into designs if desired and set aside. Flute the crust by pressing a finger into the crust against the other hand's index finger and thumb to make an even impression. Repeat every 1/2 inch around the pie to create a ruffled edge (see photo). Refrigerate the pie for at least 20 minutes.

Meanwhile, place a rack in the lower third of the oven and heat to 425 degrees F.

Brush pie with egg and place cut dough designs on top if desired. Brush again and sprinkle with sugar. Cut 6 to 8 small steam vents into the top of the dough. Place pie on a baking sheet and cook for 15 minutes, then reduce the temperature to 375 degrees F. Bake until the crust (both top and bottom) is golden brown, about 50 minutes more. If the edges begin to brown too quickly, cut a pie shield out of a piece of aluminum foil and cover the edges (see photo). Cool on a rack.

Serve pie warm or at room temperature with whipped or ice cream. Keep pie, covered, at room temperature for a day, or refrigerate for up to four.

Cook's Note: To make the dough in a food processor: Pulse the flour, sugar, and salt together in the bowl of the processor. Add a 1/4 cup of the butter and pulse until it resembles fine cornmeal. Add the remaining butter and pulse until the butter is in small pea-sized pieces. Beat the egg and 3 tablespoons of the water together, add and pulse 1 to 2 times, but don't let the dough form into a ball in the machine (see photo). If the dough is dry add pulse in the other tablespoon of water. Remove the blade and turn dough onto a large, sheet of plastic film. Use the sides of the film to bring the dough together, then wrap tightly to chill.

Busy Bakers' Tips: The filling can be made up to 2 days ahead and refrigerated. The pie can be fully formed, except for brushing with egg and dusting with sugar, and frozen. Place the pie in the freezer for 30 minutes, to harden it slightly, and then double wrap it with plastic wrap. Freeze for up to 2 months. When ready to bake, unwrap the pie and brush it with egg and sprinkle with sugar. If baking from the frozen state, following baking temperatures above, the pie may need to bake slightly longer at 375 degrees F, about 1 hour 25 minutes.

For a different finish, top with several slices of sharp cheddar cheese, and melt under the broiler for 2 minutes.

Enjoy!

Food Safety Tips
Protect yourself against food-borne illnesses.


1. Use a "refrigerator thermometer" to keep your food stored at a safe temperature (below 40 degrees fahrenheit).

Cold temperatures slow the growth of bacteria. Ensuring that your refrigerator temperature stays at 40 degrees Fahrenheit or colder is one of the most effective ways to reduce your risk of food-borne illness. You can buy a refrigerator/freezer thermometer at appliance stories, home centers (i.e. Home Depot), and kitchen stores including online ones, such as Cooking.com.

2. Defrost food in the refrigerator, the microwave, or in cold water... never on the counter!

Perishable foods should never be thawed on the counter for longer than two hours because, while the center of the food may remain frozen, the outer surface may enter the Danger Zone, the range of temperatures between 40 and 140 degrees fahrenheit, in which bacteria multiply rapidly. If you’re short on time, use the microwave or you can thaw meat and poultry in airtight packaging in cold water. Change the water every half-hour so it stays cold and use the thawed food immediately.

3. Always use separate cutting boards for raw meat/poultry/fish and cooked foods/fresh produce.

Bacteria from uncooked meat, poultry, and fish can contaminate cooked foods and fresh produce. An important way to reduce this risk is to use separate cutting boards for raw meat/poultry/ fish, and cooked foods/fresh produce.

4. Always cook meat to proper temperatures, using a calibrated instant-read thermometer to make sure.

One effective way to prevent illness is to use a food thermometer to check the internal temperature of meat, poultry, and egg dishes. The USDA Recommended Safe Minimum Internal Temperatures are as follows:

* Beef, veal, and lamb (steaks and roasts), fish - 145 degrees fahrenheit

* Pork and ground beef - 160 degrees fahrenheit

* Poultry - 165 degrees fahrenheit.

Cook meats like roasts and steaks to lower temperatures, closer to medium-rare, so that they retain their moisture. It is recommended that those who are at high risk for developing food-borne illness (i.e. pregnant women and their unborn babies, newborns, young children, older adults, people with weakened immune systems, or certain chronic illnesses) should follow the USDA guidelines.

5. Avoid unpasteurized/raw milk and cheeses made from unpasteurized milk that are aged less than 60 days.

Raw milk is milk from cows, sheep, or goats that has not been pasteurized (heated to a very high temperature for a specific length of time) to kill harmful bacteria that may be present. These bacteria, which include salmonella, E. coli and listeria, can cause serious illness and sometimes even death. The bacteria in raw milk can be especially dangerous to pregnant women, children, the elderly, and people with weakened immune systems or chronic illnesses. Raw milk cheeses aged 60 days or longer are okay, since the salt and acidity of the cheese-making process make for a hostile environment to pathogens.

6. Never eat "runny" eggs or foods, such as cookie dough, that contain raw eggs.

Even eggs that have clean, intact shells may be contaminated with salmonella, so it’s important to cook eggs thoroughly until both the yolk and the white are firm. Casseroles and other dishes containing eggs should be cooked to 160 degrees fahrenheit and you can use an instant-read food thermometer to check. Eggs should always be cooked fully and those who are at high risk for developing foodborne illness (pregnant women and their unborn babies, newborns, young children, older adults, and people with weakened immune systems or certain chronic illnesses should follow the USDA guidelines. If you can’t resist runny eggs or sampling cookie batter, use pasteurized eggs. They’re found near other eggs in large supermarkets.

7. Always wash your hands in warm soapy water for at least 20 seconds before handling food and after touching raw meat, poultry, or eggs.

You can pick up a lot of bacteria out in the world, so it’s important to always wash your hands before you eat or prepare food. You should also wash your hands after touching any uncooked meat, poultry, fish, or eggs, as the bacteria from these foods can contaminate cooked foods and fresh produce. Use soap and warm water and wash thoroughly for at least 20 seconds.

8. Always heat leftover foods to 165 degrees fahrenheit.

The USDA recommends heating all cooked leftovers to 165 degrees fahrenheit in order to kill all potentially dangerous bacteria.

9. Never eat meat, poultry, eggs, or sliced fresh fruits and vegetables that have been left out for more than two hours or more than one hour in temperatures hotter than 90 degrees Fahrenheit.

If you leave perishable foods out of the refrigerator or freezer for more than two hours they may enter the Danger Zone—the unsafe temperatures between 40 and 140 degrees Fahrenheit, in which bacteria multiply rapidly.

10. Whenever there’s a food recall, check products stored at home to make sure they are safe.

You should discard any food that’s been recalled because it’s associated with the outbreak of a food-borne illness. But, according to a survey conducted by Rutgers University during the fall of 2008, only about 60% of Americans search their homes for foods that have been recalled because of contamination. For more information on food recalls, visit the website Recalls.gov


Cavier & Vodka
Courtesy of The Lady (Bug) of the Household